
Adding video to a website, whether it’s on WordPress or not, is actually quite simple. If you upload the video to a streaming provider such as YouTube or Vimeo, it can be as simple as pasting the video’s URL into a post or page (for WordPress sites), or the video’s provided embed script code into an html or PHP document (for WordPress AND non-Wordpress sites).
There are a few different methods to get video up and streaming on your website. In this article, we’ll discuss step-by-step how to do it whether you’re on WordPress or not (although WordPress can make it a ton easier). This article will also discuss embedding video vs uploading videos, and why it’s just about always a good idea to embed and stream from a provider like YouTube or Vimeo.
First, the question: should I embed or upload?

In this context, embed refers to pulling the video streaming data from another provider, while uploading refers to streaming the video directly from the site’s own host. The answer is almost certainly to embed, for multiple reasons:
- Uploading large video files to your website can not only take forever, but can be denied by the hosting provider due to upload size and script timeout limits. Services like YouTube have super fast and efficient servers built specifically for uploading and housing video. According to fortunelords.com statistics for 2018, 300 hours of YouTube videos are uploaded every minute!
- Streaming video files that have been uploaded directly to your site are at the mercy of your host’s bandwidth. If you have multiple people trying to watch your video at once, it can slow, stall, and even crash your website due to exhausting the limited resources. Streaming services have the capacity and bandwidth to allow seemingly unlimited video watching – 5 billion videos watched on YouTube per day according to fortunelords.com.
- Many different devices (desktops, mobile devices, tablets, etc…) have different ways of interpreting and displaying video. One format, one codec, one size, one resolution does NOT fit all, so your video might not work well for everyone, and might not work at all for some. Streaming services take your uploaded video and re-encode it to lots of different formats and resolutions, and serve that video to the user based on their viewing device and internet speed on the fly.
- Piracy – While it’s possible to download videos off of YouTube and other streaming providers, it takes a little more work and effort, and a little bit of know-how. If the goal is to limit opportunity for someone to steal your video, use a streaming provider. If you upload the video to your website and place it as-is on your site, the URL for that video is public and plain to see, and anyone could simply save that URL (and by doing so download your video) to their local machine.
So, unless you have a specific need for self-hosted video, use a streaming service. However, there are some downsides to using providers like YouTube (that most people are ok with). Things like:
- Ads – The old saying goes “If you’re not buying a product, you ARE the product.” YouTube generates revenue by advertising to users, and it does that through ads on the YouTube website, pre-roll ads on videos (that play before the video), and popup ads. Some of these ads will also show up in embedded videos, so you need to be ok with that. Video streaming service Vimeo has a paid / premium account option that gets rid of ads and allows protected streaming if they bother you too much.
- Related Videos – many embedded videos will show a thumbnail grid of related videos after your video has completed. Because the algorithm that chooses those videos is based on contextual and relevancy data, this means that a video might show up that you don’t want to show up – such as a competitor’s video about the same subject, or videos with content you don’t want associated with your brand. There are some workarounds for this that we’ll outline.
How to add YouTube video to a WordPress Website
We’ll cover this first since it’s so easy to implement. In a WordPress environment, adding a video has become as simple as pasting the video’s URL into a post or page. WordPress has built-in embed functions that take a known provider’s URL and convert it to a embedded video player, without you having to do a thing. WordPress supports this functionality out of the box for many popular providers such as YouTube, Vimeo, Facebook, Twitter, and more. For a full list of supported sites, visit the WordPress Embed Codex.
To get the video’s URL, simply find the video (we’ll use YouTube as an example), and directly under the video there’s a sub-menu with a “share” button. Click the share button and a popup will provide the URL. Copy the URL and paste it into a WordPress post or page in the visual editor. WordPress will replace the URL with an embedded player. Example below:
This is pretty slick, but the only downside is you don’t get any options for how it should be sized, positioned, etc… and the mobile-responsiveness does leave a bit to be desired. Still, in a pinch it’s an excellent way to add video.
Now, what if you want a little more control? For that, here at Ultra Graphics we use a plugin called Shortcodes Ultimate, which is an almost universally loved plugin that has a TON of useful shortcodes for WordPress websites. For video, the Youtube advanced shortcode allows for a better responsive embedded video with options for the look and functionality of the player. Remember when I mentioned above how related videos can be a bummer for some sites? This allows you to turn them off by adding parameters to the YouTube URL.
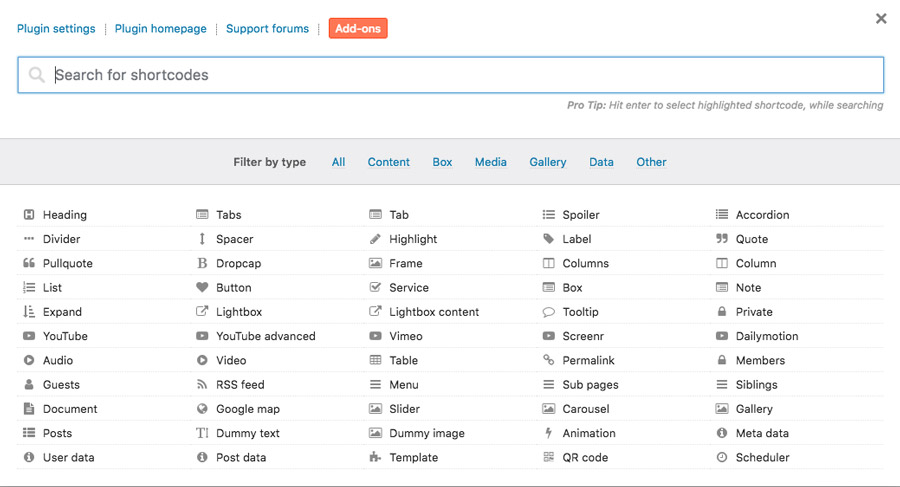
To add a video with Shortcodes ultimate, inside the visual editor click the “insert shortcode” button that appears above the editor toolbar. Then click “YouTube Advanced” and fill out the fields as necessary. You can set options like width and height (or make it responsive to fill the width of it’s container), manage the video controls, title bar, autoplay (note: NEVER autoplay videos with audio on a website, that’s just rude), loop, related videos, branding, and more. It even wraps it in a couple of blocks of code to scale down in proportion without the ugly black bars at the top and bottom. As you can see, there are also options for other video services like Vimeo and Dailymotion.
The result will look like a string of parameters wrapped in opening and closing brackets in the visual editor window, but when the page is visited from the front end, an embedded player will appear. The example below was added using Shortcodes Ultimate, check out the difference:
Now what if you don’t have/want WordPress or don’t want to use a shortcode?
If you need to be able to embed a video without the ease and simplicity of WordPress auto-functions, then you need the embed script. The embed script for a video can be found in the same popup as the YouTube URL. To get the script, after you’ve clicked the share button underneath the video, in the popup there is an “embed” button. Click that and you’ll get yet another popup with some options.
The embed script usually looks something like this:
<iframe src="https://www.youtube.com/embed/JlIeYOOOF74" width="560" height="315" frameborder="0" allowfullscreen="allowfullscreen"></iframe>
There are additional settings you can choose like whether or not to show related videos (yay!), and some of those similar title and controls settings. Once you’ve pasted the iframe into your code, the video will appear in the familiar YouTube player. Getting the embedded code is different depending on the provider you choose, but most should provide a clear way to copy and paste.
However, this iframe method will not be mobile responsive by default because it has an explicit width and height set in the iframe parameters. To make it responsive, you have to do a little more code work that might not be easy for those not familiar with html and css. Using a method that wraps the iframe code within an html div, then applying CSS classes to both the div and the iframe allows the video to scale proportionately down when the browser width changes for different devices. To do this, after you’ve pasted your iframe code into an html document, wrap it in a div with a class of “responsive-video” or something like that, example below:
<div class="responsive-video">
<iframe width="560" height="315" src="https://www.youtube.com/embed/JlIeYOOOF74" frameborder="0" allow="autoplay; encrypted-media" allowfullscreen></iframe>
</div>
Then, in your style.css or other CSS stylesheet, add the following code (from ostraining.com):
.responsive-video {
    overflow:hidden;
    position:relative;
    height:0;
    padding-bottom:56.25%;
}
.video-responsive iframe {
    height:100%;
    width:100%;
    position:absolute;
    left:0;
    top:0;
}
For a quick explanation for what’s happening here, the wrapping div is set to a position of relative, meaning we can position elements inside it relative to the parent div. Setting the height to 0 and the padding to 56.25%, we’re setting the proportion of the container to standard widescreen video with 16:9 ratio, which is what the majority of online videos are. So the height is set to zero, but the padding is pushing up from the bottom 56.25%, making the container responsive.
Next, the iframe within the div is told to fill the height and width of the container (in this case, our div), have a position of absolute (which will be relative to the container, in this case our div), and have a top and left value of 0, meaning aligned to the top left.
Those two bits of code combined allow for a responsive video that will resize itself as the window changes width for devices. Pretty cool huh? Check out the example using the responsive video embed below:
So now you know the difference between embedding and uploading, which to use, and how to do embed on a WordPress or non-Wordpress site.
Now get out there and start creating and embedding some videos! If you have any questions, please feel free to contact us.